If you double-click on a folder or register in the hit list to open it or press Open, the folder window will open as the location. In the 'Settings' dialog (ENAIO ribbon tab > Settings > Result window > Show separators), choose if you want to show or hide the status bar and separators.
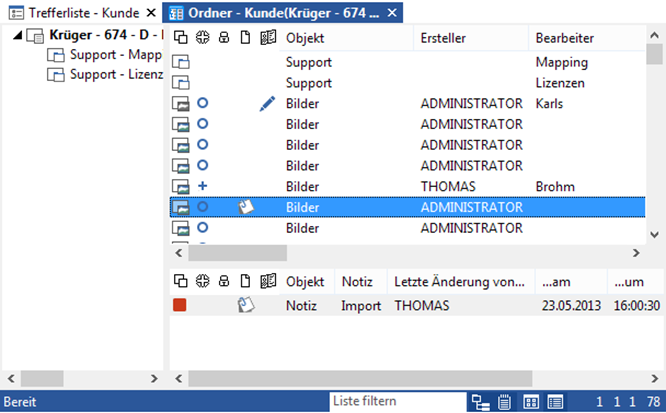
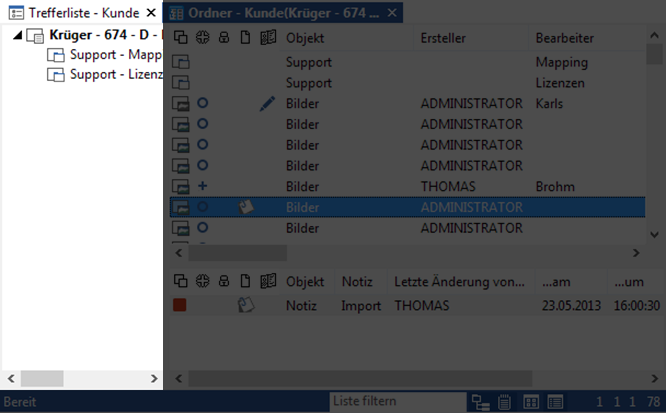
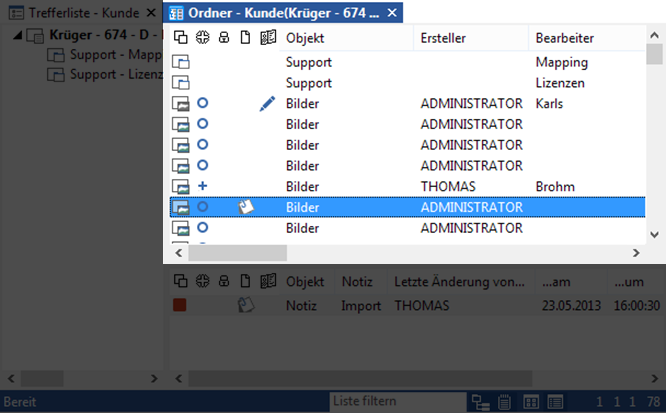
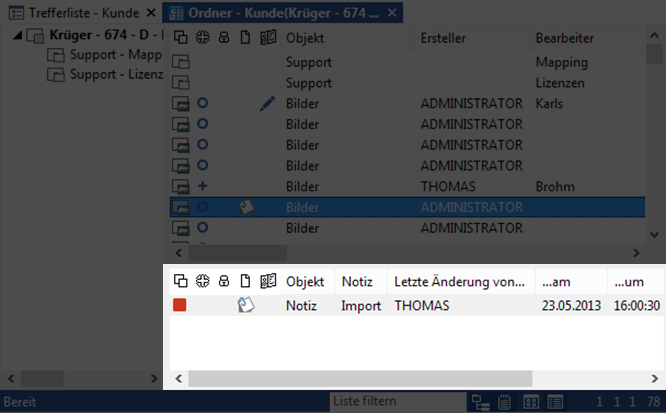
The folder window is separated into three areas: the navigation area on the left, the content area at the top right, and the optional link area at the bottom right. You can adjust the width of areas by dragging it with the mouse. There is a status bar below the areas of the folder window.
The navigation area contains the register tree. If you select a register or a folder, the folder name will be set in bold, and the content will be shown in the content area on the right.
The index data chosen in the settings (see 'Fields' area ) allows you to identify folders and registers in the navigation. In the 'Settings' dialog, you can additionally define whether or not to alphabetize registers and whether or not to display the number of objects contained in a register in front of each register.
The number of objects displayed does not take into account whether you have access to all objects. That is why the hit list may contain fewer objects than shown here.
The content area lists the content of the selected register or folder. You can have the contents shown in the report or quicklook view. Click the appropriate buttons on the status bar of the result window to switch between the two views.
To hide the content area, select Options from the context menu of the folder icon in the object search. Untick the checkbox for the Show register tree option. Further options enable you to alphabetize the registers within a layer of the navigation area.
You can filter the content in the content area. In the case of filters you personally created, only the folder content conforming to the filter criteria is shown (see View Filters).
The link area displays the links of a selected register or document. If several objects are selected, the links of the top object are shown. You can drag objects into the link area to create links. You can also filter the content in the link area (see View Filters).
The different view options of the folder window can be found in the status bar:
-
 Quicklook view
In the quicklook view, you will see a preview of the first page of image documents and W-Documents which are created in an Microsoft Office application. A default icon will be displayed for folders, registers, and other documents.
-
 Report view
In the report view you will see the folder content as a list. The list columns are displayed just like they are in a hit list (see Searching for Documents). You can group the folder content (see Grouping Hit Lists).
-
 Register tree
All folder documents will be shown regardless of their location in registers. The navigation area will be hidden.
Go to Options > context menu of the folder type in the object search to specify whether the folder hit list is shown as a register tree.
Use the context menu of the objects in the left navigation area to open them in a new window.
-
 Link area
Click the icon to show and hide the link area. The link area shows the links of a marked object.
Folder ribbon tab
The Folder ribbon tab provides the following functions:
| Icon | Comment |
|---|---|
|
|
Object Opens a menu with the object types configured to create new objects. The folder, register, or document type you selected last will appear in bold in the list. |
|
|
Scan Opens a menu with the object types configured to capture images. Clicking an image object type opens the batch scan dialog (see Creating and Filing Images). The most recently selected object type will appear in bold. |
| Icon | Comment |
|---|---|
|
|
Location The following functions are available to you for the location:
The location functions show all location relationships for a selected object in an overview. This includes filing locations, reference documents, links, and notes. |
|
|
Index data The following functions are available to you for index data:
In an index data form, you can open the basic parameters using the |
|
|
Content The following functions are available to you for handling content:
|
|
|
Open Opens the marked object. For folders and registers, the location is displayed; for documents, the content file is opened in an application associated with the file type. |
|
|
Variants Opens the variant administration of a marked W-Document (see Variants of W-Documents). This function is inactive for other document types, folders, and registers. |
|
|
More Click the
|
| Icon | Comment |
|---|---|
|
|
Check in Checks in a checked-out W-Document and saves any changes made to the document content (see Checking In Documents). This function is inactive for other document types, folders, and registers. |
|
|
Discard changes Checks in a checked-out W-Document and discards any changes made to the document content. The editing state before check-out is restored. This function is inactive for other document types, folders, and registers. |
|
|
Delete Deletes a marked object (see Deleting Documents or Deleting Folders and Registers). The settings of enaio® client allow you to specify whether you want to receive a confirmation dialog before deleting (see 'Confirm' area ). |
|
|
Create copy Creates a copy of the marked object (see Copying Documents or Managing Folders and Registers). |
|
|
Free text Opens a text editor. You can edit the content of a link text in the editor. If there is no link or link text to the marked object, this function is inactive (see Links). |
|
|
Split pages Opens a marked image document in batch scan mode (see Creating and Filing Images). Like in batch scan mode, you can add or split images. This function is inactive for other document types, folders, and registers. |
|
|
Archiving Changes the archiving status of the marked object:
|
|
|
Signature Opens the marked document in signature mode (see Signing Documents Electronically). The function is inactive for objects without a signature. |
| Icon | Comment |
|---|---|
|
|
Creates an e-mail for sending the marked object. You have the following options:
|
|
|
Application Transfers the marked folder to an external application (see Links to External Applications). |
|
|
Clipboard
You need the Client: Send content as e-mail system role for the Clipboard action. Creates a link or a copy from the marked object. The following options are available:
|
|
|
Favorites Click the
The user can also see the favorites created in enaio® client under their favorites in enaio® webclient, in enaio® webclient as a desktop application, and on mobile devices in enaio® mobile. Favorites created in enaio® webclient, in enaio® webclient as a desktop application, and in enaio® mobile are also synchronized with enaio® client. |
| Icon | Comment |
|---|---|
|
|
Allows you to select a view filter (see View Filters). |
|
|
Filters Allows you to create a view filter (see View Filters). |
|
|
Refresh Updates the hit list after changes have been made. |
|
|
Cancel Cancels an update. The folders which have already been found are shown in the hit list. |
|
|
Up Offers you the option of navigating up one level in the folder structure. |
| Icon | Comment |
|---|---|
|
|
Export You can choose whether to export the |
|
|
You can print one or more selected documents. The following options are available:
|
| Icon | Comment |
|---|---|
|
|
Start workflow Will start a workflow with one or more marked objects (e.g., documents or folders) (see Starting Workflows). The marked objects are linked into the record of the workflow. |
|
|
Follow up Opens the Follow-up window. Here you can enter the data associated with a follow-up (see Follow-Ups). You can apply this function to one or more marked objects. |
|
|
Subscribe Opens the Subscribe window. Here you can enter the data associated with a subscription (see Subscribing to Objects). You can apply this function to one or more marked objects. |
|
|
Share Opens the Share document window. Here you can enter the data associated with a document share (see Sharing in enaio®). You can apply this function to one or more marked documents. |
| Icon | Comment |
|---|---|
|
|
Full text Opens the full-text search where you can run a search covering all objects in the selected folder or register, including subregisters (see Full-Text Index Queries). To use this function, you must mark a folder or a register. |
|
|
Find similar objects Executes a full-text search based on the index data and the content of the selected object. |
|
|
Free text Starts a search covering all notes and links of objects shown in the content area. After the search, the content area will show only the objects with notes and links that contain the search term. |
|
|
Cancel search Clicking this icon stops a query of notes or links (free-text search) so that all objects are once again shown in the content area. |
Optimized Context Menu
The optimized context menu only contains the most frequently used functions. If you do not use optimized menus, more features from the ribbon tab will be displayed in the context menu (see 'Workspace' area ).
View Filters
The content area of folder windows can be clearly arranged using view filters that apply to the entire cabinet. Click the Filter button to set up view filters. Choose a view filter from the accompanying list. This filter can be flagged and, as a result, used every time a folder window is opened in the content area.
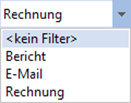
Select a view filter from the list of view filters on the Folder ribbon tab in the List ribbon group.
A selected view filter is only applied to the active folder window. The next time the folder is opened, the default filter will be applied if you have set a default filter in the Filter management window.
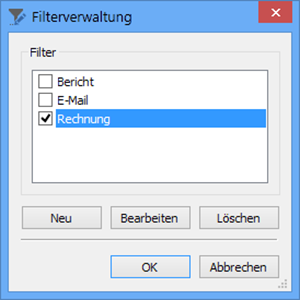
You set up new view filters via the filter management. Open the filter management by clicking the ![]() Filter icon on the Folder ribbon tab in the List ribbon group.
Filter icon on the Folder ribbon tab in the List ribbon group.
View filters which have already been set up for this cabinet are listed in the filter management.
-
Click the New button in the filter management.
A new view filter will be added.
-
Enter a name for the view filter in the selected field. Filter names must start with a letter or number.
-
Click Edit.
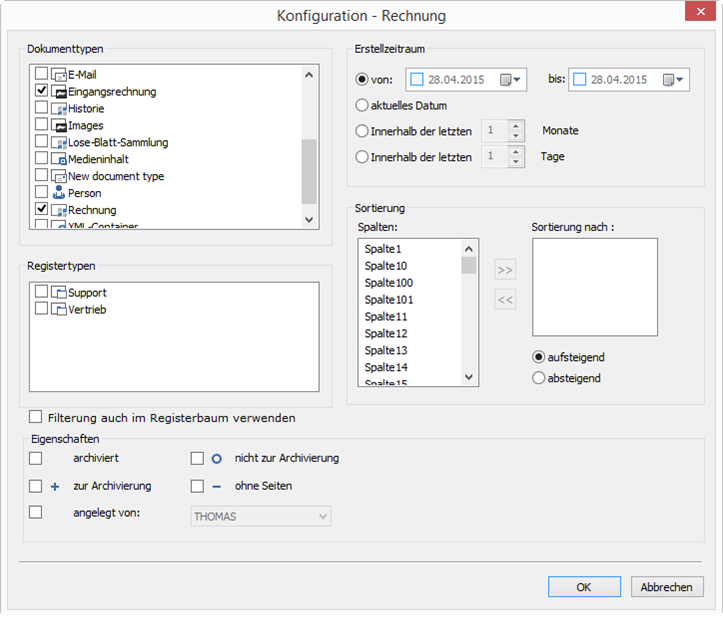
The Configuration window will now open.
In the Document types area, select the document types which will be shown in the content area.
In the Creation period area, you can enter a time period for the document types:
 from
from
Open the calendar and select a date. The entry with the selected date must be enabled for it to affect the filtered results. Documents that were created before this date will not be shown.
 to
to
Specify the end of the search period in the same way. Documents that were created after this date will not be shown. If an inactive date is shown in the filter, it will not affect the search period.
 current date
Select this option to display documents that have been created on the present day.
 within the last months
Mark this option and enter the value n if you only want to show documents that have been created within the last n months.
 within the last days
Mark this option and enter the value n if you only want to show documents that have been created within the last n days.
In the Properties area, you can set the archiving properties.
All entries are linked using the logical AND.
You can also filter documents based on the Created by user criterion.
You can choose the index data fields to be used as columns in the folder window in the Sorting area. Use the arrow buttons to place the columns in the Sorting area in the desired order. The objects can be sorted alphanumerically or naturally (see Default settings).
In the Register types area, you can select the register types to be shown. All registers of the selected types will be displayed.
The filter criteria will also be applied to the content of registers if you have enabled the relevant option.
All register types will always be displayed in the navigation area.
-
Confirm your entries by pressing OK.
The new filter will be displayed in the 'Filter management' window in the list of available filters.
You can edit and delete saved filters in the Filter management window.
To rename a filter, click its name and then click again to make the field editable. You can then edit the name.
If you enable a filter in the Filter management window, it will automatically be applied as the default filter every time a folder window is opened. When the folder window is opened, only documents which match the filter criteria of the default filter are initially shown. Another view filter can subsequently be set manually. If no default filter is active in filter management, the filter manually set in the folder window will be applied again when the window is opened again.
You can flag a preconfigured view filter as the default filter for each cabinet. The default filter will be applied to the content area every time the folder window is opened.
You set up default filters via the filter management. Open the filter management by clicking the ![]() Filter icon on the Folder ribbon tab in the List ribbon group.
Filter icon on the Folder ribbon tab in the List ribbon group.
The preconfigured view filters are listed. Select the view filter that you want to set as the default filter. It will be used every time you open a folder window. If you do not enable a view filter, no filter will be used.


 areas. Use the toolbar to show all hidden areas at once:
