Customer and Project
Here is an example to explain the settings you will need to make under Customizing.
Customer

A new customer with an ID and a name is created via the root context menu. The customer name can also be changed at a later time.

Next, you need to manage the Connection Settings under 'External systems'.
If you are making further changes to the settings as part of customizing, a working connection to a enaio® system is necessary in order to use input help when entering the object definition.
Project
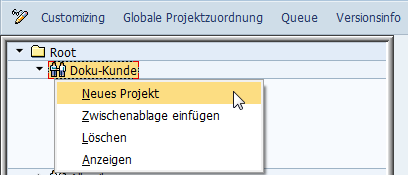
A new project along with the name (can also be changed at a later time), project number, and variant is created via the context menu of the customer, or a project previously copied from the clipboard is added.
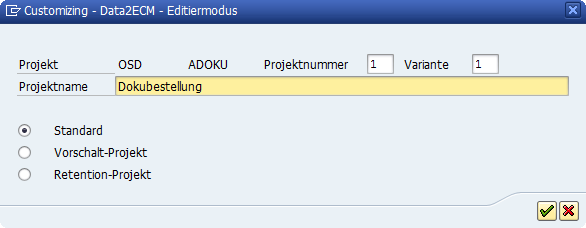
If you wish the project to be a Upstream Project or Retention Project, you can specify this here.
After creating the project, you can then manage the project properties.
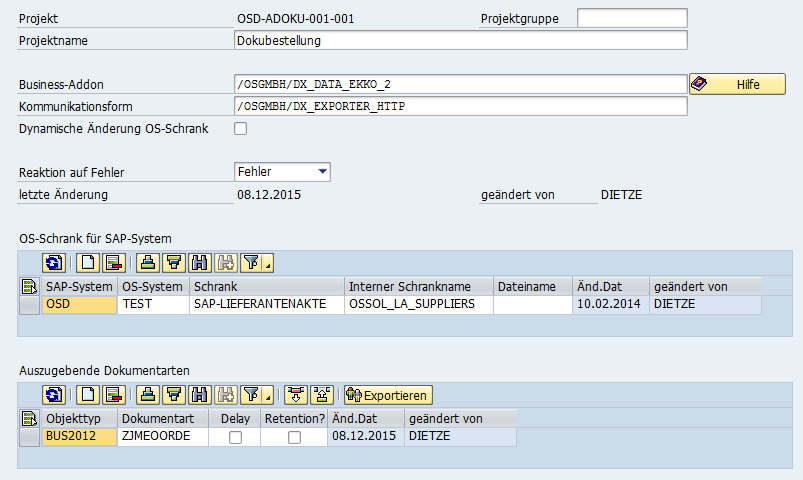
The project group can be used to group different projects in the customizing tree. Example:

Enter the following project settings and save them:
|
Field |
Explanation |
|---|---|
|
Project group |
Optional/groups various projects together in the customizing tree |
|
Business add-on |
Select the retrieval class |
|
Communication format |
Select the data output format: |
|
Dynamic change to OS cabinet |
If this option is selected, the cabinet can be set dynamically depending on the SAP® values (for example, company code) by using a modification class (to be entered in the project tree under Data modifications). |
|
Response to errors |
Program response to external errors: ignore, warning, or error |
|
SAP system |
System ID |
|
OS system |
Was entered under 'External systems' (see Connection Settings); can be selected using input help |
|
Cabinet |
Name of the non-technical cabinet in enaio® that will collect the exported data; can be selected using input help Note: It is also recommended that you define a cabinet if it is determined dynamically during the data output process or if data is output via a file to ensure that the object definition can be accessed during customizing and that input help can be used. |
|
Internal cabinet name |
Optional; auto-populated if cabinet input help is used |
|
File name |
The file name must be entered for the communication formats /OSGMBH/DX_EXPORTER_CLASSIFY, /OSGMBH/DX_EXPORTER_FILE, and /OSGMBH/DX_EXPORTER_XMLFILE. If this is the case, the cabinet name is ignored when data is output. |
|
Object type |
Business object type of the documents to be output with this project; can be selected using input help. |
|
Document type |
Document type of the documents to be output with this project; can be selected using input help; must be linked with object type and content repository (see Connection Settings) (transaction OAC3) |
|
Delay |
For mass archiving, the transfer of documents of certain types can be delayed until the next run of the queue job. |
|
Retention? |
This box must be ticked if, in addition to the index data of the documents, you also want to transfer the retention date from the link table to the archiving system (see Retention Management). |
The following functions are available to you in the project context menu:
|
Function |
Explanation |
|---|---|
|
Export |
The project data can be assigned to an SAP® transport order. The customer is also transported automatically at this time as well. |
|
Export without document type assignment |
This export variant can be used if you do not want to transfer the existing document type assignment to the target system. |
|
Copy project to clipboard |
Projects can be copied and then added under the same or another client or project group. The following project properties are not copied (these must then be entered manually):
|
|
Connection test |
The connection to the enaio® is tested using the project-specific parameters. |
|
Delete (only in edit mode) |
The project is deleted. |
Objects
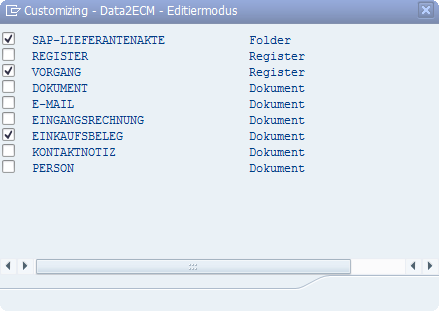
Objects are now added to create the project structure.

You can use the functions available in the context menu to import them from enaio®.
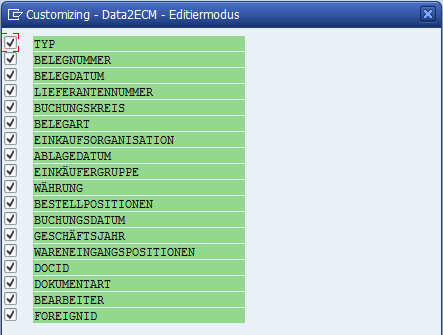
During the import process, the available objects can be selected.
These objects can now be assigned various properties (header data). You can use input help to assign them.
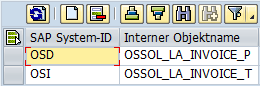
System-specific alternatives can be maintained for the internal object names.
This can be used, for example, to address a test cabinet and a production cabinet on an enaio® system that have different internal names for cabinets and registers.

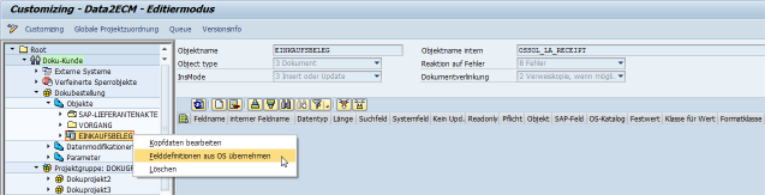
The field definition can be performed manually (using the standard SAP® functions) or imported from enaio®.
The icons behind the field length indicate the enaio® data type. The format class /OSGMBH/DX_FRM_XFLAG_TO_INT (for conversion from X to 1) is entered automatically for checkboxes.
The read-only field is used in Customizing for information purposes after the object definition has been read if fields are write-protected there.
If you want to transfer the contents of these fields, you will need to untick the read-only checkbox in the field table and enable the 'IGNORE_READONLY' parameter.
You can use two other flags to define whether the contents of individual fields should be excluded from the transfer:
With 'No update', data is only transferred when new objects are created; the field is omitted when existing objects are updated.
After selecting the fields, you now have to decide how to populate them.
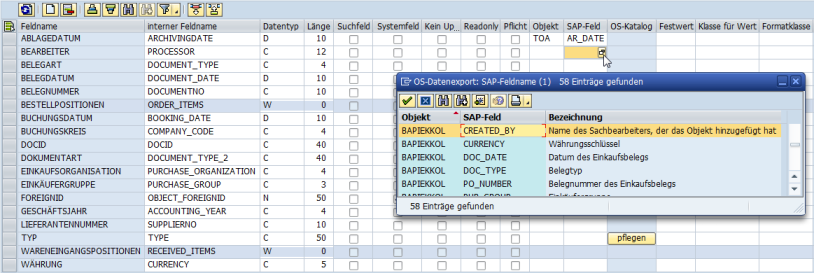
For example, SAP® object and SAP® field are filled, for which input help is available. This contains the most important fields provided by the business add-on. Additional fields can be filled in manually.
Other options for populating fields include:
-
Fixed value
-
Class for value (for value determination)
-
Format class (for value changes)
The following format classes are supplied by default:
|
Class name |
Short description |
|---|---|
|
/OSGMBH/DX_FRM_CLASSIFY_NUM |
Prepare numerical values for Classify |
|
/OSGMBH/DX_FRM_DEL_LEAD_ZERO |
Delete leading zeroes |
|
/OSGMBH/DX_FRM_FULLNAME |
Plain text name for SAP® login |
|
/OSGMBH/DX_FRM_GET_MONTH |
Month from date |
|
/OSGMBH/DX_FRM_GET_YEAR |
Year from date |
|
/OSGMBH/DX_FRM_INS_LEAD_ZERO |
Insert leading zeroes |
|
/OSGMBH/DX_FRM_LOGIN_ADD_G |
SAP® login plus "(g)" |
|
/OSGMBH/DX_FRM_LOGIN_ADD_U |
SAP® login plus "(u)" |
|
/OSGMBH/DX_FRM_NO_SPACE |
Remove spaces |
|
/OSGMBH/DX_FRM_WO_SPECIAL_CHAR |
Remove special characters |
|
/OSGMBH/DX_FRM_X_TO_INT_INVERS |
'X' > 0; SPACE > 1 |
|
/OSGMBH/DX_FRM_XFLAG_TO_INT |
SPACE > 0; 'X' > 1 |
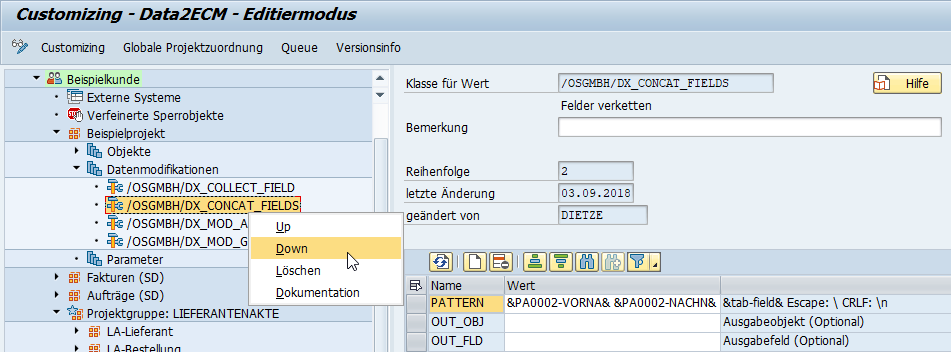
Data Modifications
You can use the context menu of data modifications (in the project tree under Objects) to add modification classes, change their sequence, and delete them.
There are preconfigured modification classes available. Refer to user help to find out how they work.
Examples of modification classes:
/OSGMBH/DX_COLLECT_FIELD
This class links several values of a field (e.g., from the positions) to a new field.
/OSGMBH/DX_CONCAT_FIELDS
This modification class can be used to concatenate the values of different fields.
/OSGMBH/DX_MOD_ADD_TABLE
This class reads one or more records from any table.
/OSGMBH/DX_MOD_GENERIC
The modification class can be used to read additional data generically.
/OSGMBH/DX_INSERT_TOAAT
This modification class reads the additional ArchiveLink data for a link, provided that the ArchiveLink extension is enabled.
If this is not the case, empty fields will be output.
The modification classes can be used more than once in a project.
Parameters
Additional parameters can be defined on a project-specific basis in the Parameters branch.
Examples of optional parameters that can be assigned when using the /OSGMBH/DX_EXPORTER_REST communication format include:
|
Parameter |
Description |
|---|---|
|
IGNORE_READONLY |
Ignore read-only flag |
|
IGNORE_CATALOGUE |
Ignore field catalogs |
|
IGNORE_OBLIGATION |
Ignore mandatory field flag |
Examples of optional parameters that can be assigned for special retrieval classes include:
|
Business add-on |
Parameter |
Description |
|---|---|---|
|
/OSGMBH/DX_DATA_BKPF |
TAXFLAG |
Flag for tax lines |
|
/OSGMBH/DX_DATA_BUS2081_2 |
ORDER_NOT_REQUIRED |
Order reference not required |
 areas. Use the toolbar to show all hidden areas at once:
