Address Add-on
The address add-on is only available for ANSI installations. You can use the Fieldmapping add-on in Unicode installations with the same functions.
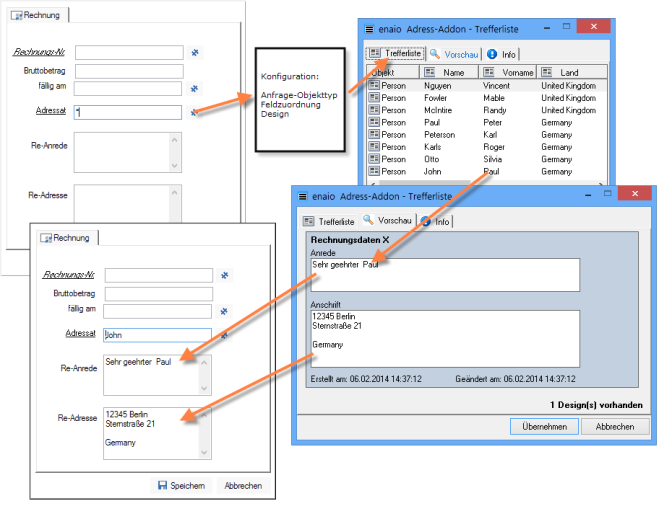
The address add-on transfers index data of a queried object into index data fields which are linked to the add-on field via the Controlled by crosscheck property.
Process:
The add-on searches for the configured query object type with the data in the add-on field and the crosscheck fields. The results are displayed in a hit list. Hits can be shown in a preview. If more than one design templates is available, the user can select one and transfer the data in the corresponding format.
Schema:
Configuration is not performed in the configuration field in enaio® editor but in the wizard which is launched in enaio® client. To access the wizard a user requires the system role 'Editor: Start'.
You assign the address add-on to a text field. Use the file selection dialog to select the file axaddaddress.dll located in the enaio® editor installation directory and the administration components.
You can define the property Controlled by crosscheck for all other fields into which data will be transferred, depending on the add-on field and with a consecutive position number.
The address add-on cannot be used if the object type names or field names contain a semicolon.
Configuration
Right-click the Add-on button on the form to launch the wizard in enaio® client. After a standard dialog you can specify the search scope.
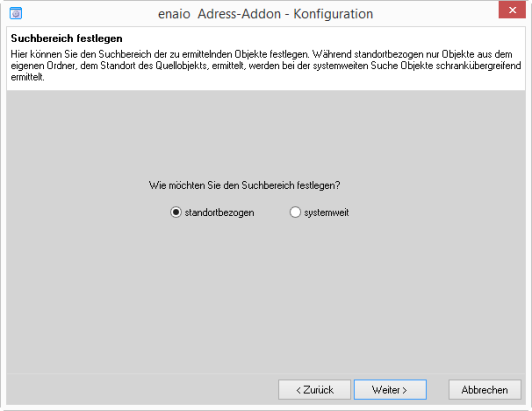
Specify if you want to transfer location-related data of a query object from the same cabinet or system-wide data of any query object.
Select the query object in the following dialog.
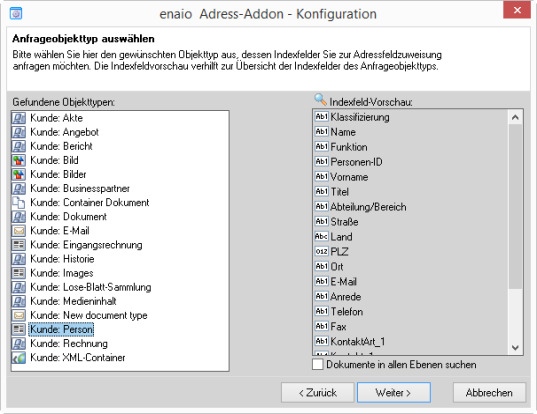
Objects are listed on the left side based on their location or across the entire system. If you select an object, the object fields are listed on the right side.
Specify for all register and document types if only the top level in the folder is queried for objects or if all levels are searched.
In the following dialog you can select a salutation and an address field.
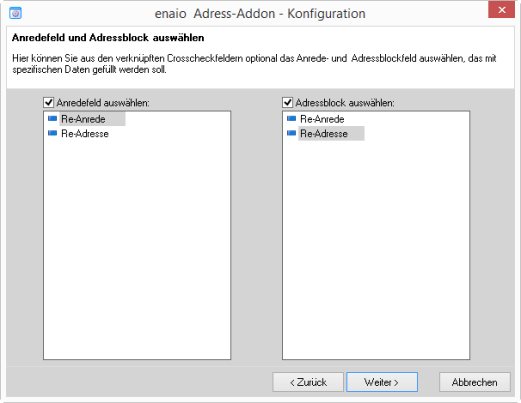
The salutation and address fields are crosscheck fields to which you can map fields of the query object type. Data from multiple fields of a query object can be transferred into these fields. You can specify simple formatting with design templates.
The salutation and address fields are optional. The content is not analyzed when searching for a query object.
Only one field of the query object type can be assigned to all other Crosscheck fields. This mapping is valid for queries and data transfer.
You can assign fields of the query object type to the add-on field and all crosscheck fields in the following dialog.
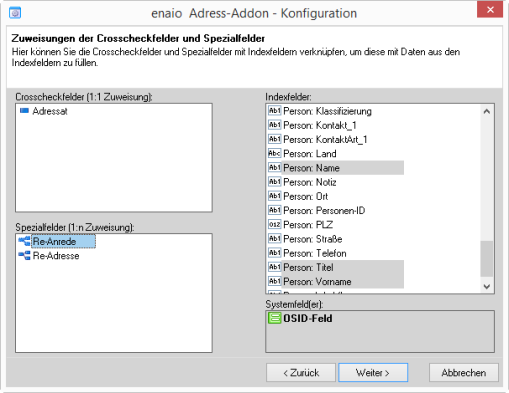
The add-on field and all crosscheck fields which were not specified as salutation or address fields are listed in the crosscheck fields area.
Select a field there and then a field of the query object type in the Index field area to create a mapping. Assignment to the OSID system field is also possible. Then a query for the ID of the query object is performed using the content of the add-on or crosscheck field.
More than one index field can be mapped for the special fields 'Salutation' and 'Address'.
Each field has to be mapped to a field of the query object type or to the OSID.
In the following dialog you can specify a design for the salutation and address fields.
Those designs which have already been created are listed and can be edited.

You can define multiple designs and let the user select which one he or she wants to use. In a preview the user can choose which design will be used.
The New button is used to create a new design:
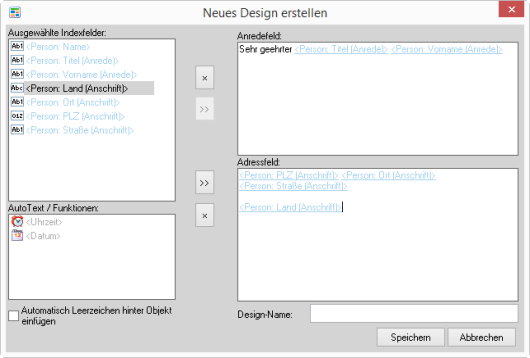
You can find all assigned fields of the query object type in the Selected index fields area. The possible mapping of salutation and address field is flagged. The add-on field and other crosscheck fields can be assigned in any way using the arrow buttons.
You can enter any text, spaces, line breaks, and functions for the current date and the current time in the Salutation field and Address field area.
Enter a design name and save the data.
The new design will be displayed in the list of existing designs. You can create and edit further designs.
Click Next and Finish.
The configuration is saved as a file in the \server\etc directory.
If you are working with multiple servers, you have to copy the configuration file into the corresponding server directory.
 areas. Use the toolbar to show all hidden areas at once:
