You can add annotations to image documents in the document display window. Annotations are organized on layers.
Annotations on layers can only be created and edited when no other user is editing the document. If another user has edited annotations and saved them while you were also working on them, you cannot save your changes.
Annotations on layers are not included in document versions in the history. Image documents are always displayed here with the layers of the current version.
Layer Types
Depending on access rights and system roles, the following layers can be created:
Each enaio® user can create private layers. Private layers can only be accessed by the creator. Only the creator can show/hide, edit, or delete personal layers.
If authorized by the administrator, you can create static group layers. These layers are only visible to users from a specified group.
Users who have the right to create group layers can hide, show, and edit the layers they created.
Users who also have the Edit static layers of other users system role can show, hide, delete, and edit all static group layers.
If authorized by the administrator, you can create dynamic group layers. These layers are visible to all users from a specified group. All users can edit, hide, show, and delete them. They can only be created by users who have the right to create group layers.
If authorized by the administrator, you can create static public layers. These layers are visible to all users.
Users who have the right to create public layers can hide, show, edit, and delete layers which they created themselves
Users who also have the Edit static layers of other users system role can show, hide, delete, and edit all static public layers.
If authorized by the administrator, you can create dynamic public layers. These layers are visible to all users. All users can edit, hide, show, and delete them.
They can only be created by users who have the right to create public layers.
Access rights and system roles are assigned by your administrator. For this reason, there may be layers which you can see but cannot hide or edit.
enaio® can be configured so that references to image files that you receive by e-mail, for example, can be opened immediately using the enabled layer administration.
Creating Layers
You can create group layers and public layers only if authorized to do so by the administrator.
-
Open the image document in the document display window (see Document Display Window).
-
Open the annotation window of the document by clicking the
 Annotationsicon in the Image view ribbon tab > View.
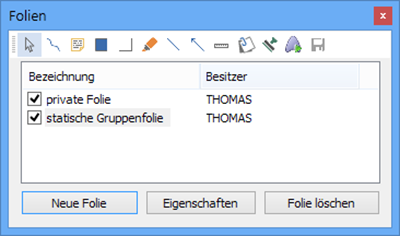
The Layers window will open.
Any layers containing annotations are listed in the window.
-
Click the New layer button.
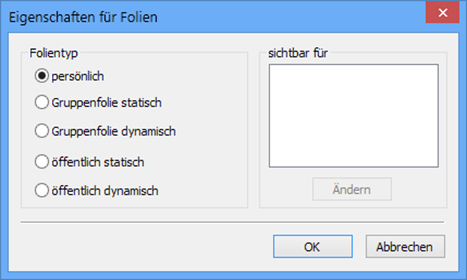
The Layer properties window will now open.
-
Select the layer type.
If you select a group layer, you can adjust the visibility of the layer. To do so, click the Change button.
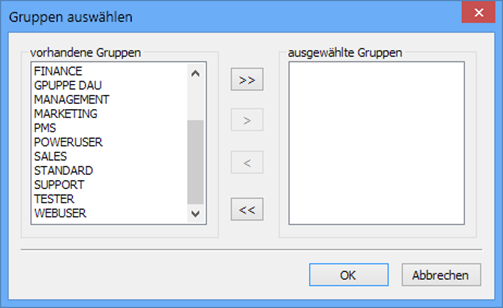
The Select groups window will now open.
-
Select one or more groups. Use the arrows to move them to the Selected groups field.
-
Click OK or press the ↩ enter key.
The Layer properties window will open again.
-
Click OK or press the ↩ enter key.
The layer will be created, displayed, and selected in the Annotations window.
Creating Annotations for a Layer
The annotations you create on a layer can comprise freehand lines, texts, filled rectangles, rectangles, marks from highlighters, lines, arrows, rulers, notes, rubber stamps, and buttons (which you can use to set links and start a program).
-
Open the image document in the document display window (see Document Display Window).
-
Open the annotation window of the document by clicking the
 Annotationsicon in the Image view ribbon tab > View.
The Layers window will open.
Any layers containing annotations are listed.
-
Mark a layer or create a new one.
Select one of these tools from the toolbar:

 Freehand line
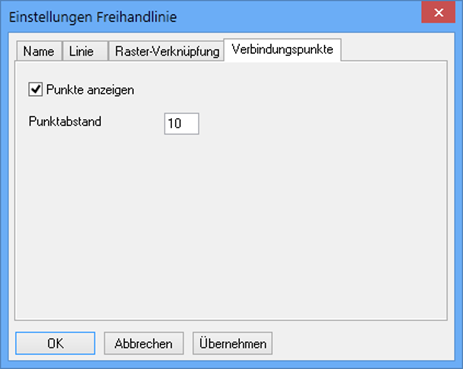
Use your mouse to draw a line. Select Freehand line settings in the context menu of the line to edit the settings: Name, Line, Grid link, Foreground color, Dots, and Hyperlink (see Annotation Settings).
Freehand lines contain connection points which you can use to edit them.

 Text
Text
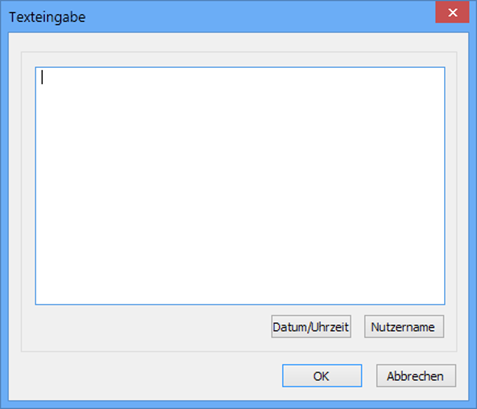
Use your mouse to draw a rectangle. The Text input window will now open.
Enter your text. By clicking the buttons, you can add the current date and time or your user name to the text. Use Ctrl+Enter ↩ to add a line break.
Click OK to close the Text input window. After pressing the ↩ enter key to confirm the text, you can select Text settings in the context menu to edit settings such as: Name, Line, Fill, Foreground color, Background color, Font, Text, and Hyperlink.
The # character is interpreted as a control character by the annotation module and may not be used.

 Filled rectangle
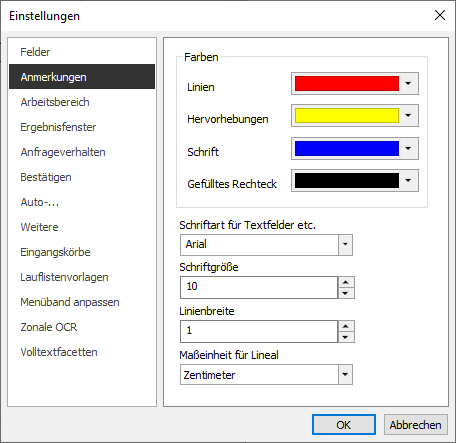
Use your mouse to draw a rectangle. Select Filled rectangle settings from the rectangle's context menu to edit the Name, Background color, and Hyperlink settings. Go to ENAIO ribbon tab > Settings > Annotations to select the default color for the filled rectangle.

 Rectangle
Use your mouse to draw a rectangle. Select Rectangle settings in the rectangle's context menu to edit the settings: Name, Line, Grid link, Fill, Foreground color, Background color, and Hyperlink.

 Highlighter
The highlighter is basically the same as a filled rectangle. Use your mouse to draw a rectangle. Select Highlighter settings from the rectangle's context menu to edit the settings: Name, Background color, and Hyperlink.

 Line
Line
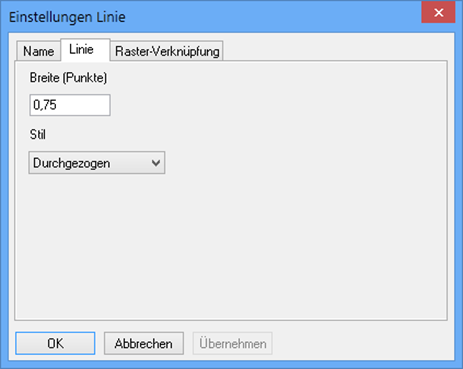
Use your mouse to draw a line. Select Line settings in the context menu of the line to edit the settings: Name, Line, Grid link, Foreground color, Dots, and Hyperlink.

 Arrow
Arrow
Use your mouse to draw a line. The tip of the arrow will be at the beginning of the line. Select Arrow settings in the context menu of the line to edit the settings: Name, Line, Grid link, Foreground color, and Hyperlink.

 Ruler
Ruler
Use your mouse to draw a line. The length of the line is calculated and displayed at the end of the line. Select Ruler settings entry in the context menu for the ruler to edit the settings: Name, Line, Grid link, Fill, Foreground color, Background color, Font, Ruler, and Hyperlink.

 Note
Note
Unlike a text, a note cannot have a transparent background. Use your mouse to draw a rectangle. The Text input window will now open.
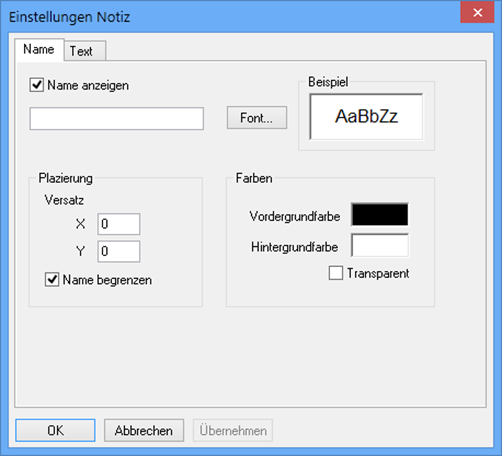
Enter the text for the note. Use the buttons to add the current date and time or your user name to the text. Use Ctrl+Enter ↩ to add a line break. Select Note settings in the context menu to edit the settings: Name, Foreground color, Background color, Font, Text, and Hyperlink.
The # character is interpreted as a control character by the annotation module and may not be used.

 Stamp
Stamp
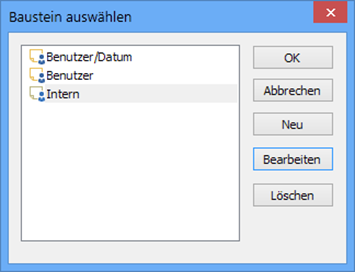
The stamp allows you to add a boilerplate text as annotations to a layer. Use your mouse to draw a rectangle. The Select boilerplate window will now open.
Select an existing boilerplate or create a new one:
You cannot edit
 Boilerplate texts provided via a profile.
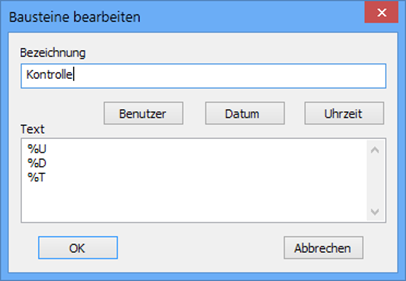
Click the New button. The Edit boilerplate window will now open.
Enter a name and a text. Use the buttons to add the current date and time or your user name to the text. Use Ctrl+Enter ↩ to add a line break. Select Text settings in the context menu to edit the settings: Name, Line, Fill, Foreground color, Background color, Font, Text, and Hyperlink.
The # character is interpreted as a control character by the annotation module and may not be used.

 Link/Start program
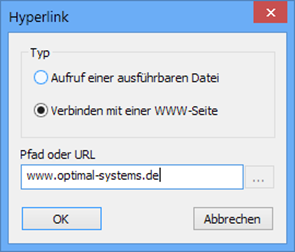
There is a button available that allows you to create links to external programs or Internet pages.
Use your mouse to draw a rectangle. Select Settings button in the button's context to edit the settings: Name, Fill, Foreground color, Background color, Font, Text, and Hyperlink.
-
Use the tools to lay out annotations in the document display window.
-
Save the annotations by clicking the
 Save annotations icon.
The annotations are saved on the layers and displayed in the document display window.
Documents which you want to create annotations for may not be rotated in the document display window. The position of an annotation is always relative to the saved document, not relative to the position after the document is rotated.
Annotation Settings
You can influence the appearance of the annotations in the following places:
You can change the entries from the settings (see ENAIO ribbon tab > Settings > 'Annotations' area ) to customize the basic appearance of the annotations.
The settings, such as those for the colors and line width, also determine the appearance of the annotations on the layers as well as other properties. When editing a slide, you can change these basic settings on an individual level at any time for the respective annotation via the context menu.
When editing a layer, the Settings option of the context menu provides various functions depending on the type of annotation:
You can define how the line colors and the background color of the annotations relate to the color of the document. You can choose between Copy (normal), AND (highlight), and XOR (invert).
You can choose further properties, for example, for the background of texts, stamps, and rectangles. Mode: Select whether the background will be transparent, translucent, or opaque. Pattern: Select a texture to be displayed in the foreground color.
Select a foreground color, e.g., for text and lines.
Select a background color, e.g., for the filled rectangle, the stamp, and the text.
Select a font type, style, and size for texts, notes, buttons, and stamps.
Set the units in the Measurement units field, the number of digits after the decimal point is set in the Precision field, and the length of the ruler's page limits is set in the Gauge mark field. Also set the length of the Tick marks between the page limits.
Editing Annotations
You can edit the annotations on your private layers and, depending on the rights granted to you by the administrator, on public and group layers.
-
Open the annotation window of the document by clicking the
 Annotationsicon in the Image view ribbon tab > View.
The Layers window will open.
The existing layers are listed.
-
On the Annotations window, select the layer whose annotations you wish to edit. If necessary, hide other layers for a better overview (see Showing and Hiding Layers).
-
Click the
 Select icon to enable the selection mode.
 -
Click an annotation to select it in the document display window.
Sizing handles will appear at the corners of the annotation.
If one annotation is covered by another, select Send to back in the context menu to move the annotation to the background of the layer.
Press and hold the mouse button to reposition annotations and use the sizing handles to increase or decrease the size of the annotations.
Select Tool settings in the annotation's context menu to edit the annotation design (see Annotation Settings).
-
Save the annotations by clicking the
 Save annotations icon.
There are more options for editing an annotation available in its context menu:
| Entry | Comment |
|---|---|
|
Delete |
The selected annotation is deleted. |
|
Bring to front |
The selected annotation is moved to the foreground. |
|
Bring to back |
The selected annotation is moved to the background. |
Showing and Hiding Layers
You can only hide static group layers and static public layers if the administrator has granted you this right.
Editing Layers
You can edit your private layers. You can also edit public and group layers if you were granted the respective rights by the administrator.
-
Open the annotation window of the document by clicking the
 Annotationsicon in the Image view ribbon tab > View.
The Layers window will open.
The existing layers are listed. The displayed layers are flagged with a checkmark (see Showing and Hiding Layers).
Use the buttons in the window to create a new layer (see Creating Layers), change the properties of a marked layer, or delete a marked layer. -
Right-click to open the context menu on a layer in the document display window.
The context menu contains the following options:
Entry Comment Deleting Reference Documents
The layer is deleted.
Bring to front
The layer is moved to the foreground.
Bring to back
The layer is moved to the background.
Default Settings
Here, you specify the default settings for all annotations.
-
Save the annotations by clicking the
 Save annotations icon.
The edited layer is saved.
Printing Layers
If you want to print layers which can be edited, open the document in the display window and the print dialog using the keyboard shortcut Alt+P. In the print dialog, tick the Print annotations checkbox.
When printing image documents, layers which cannot be edited will be printed as well.
 areas. Use the toolbar to show all hidden areas at once:
