Entra ID: Configuration
Entra ID: Requirements
-
enaio® server is operated at one location in a local domain.
-
Users from the local domain can authenticate themselves with enaio® client, enaio® webclient as a desktop application, or enaio® webclient.
-
Users from other domains for which there is no user account in the local domain can authenticate themselves to Entra ID using enaio® webclient.
-
-
Creation of new users in enaio®.
-
All users are created for the first time with their UPN as their login name in enaio® as part of the Entra ID synchronization.
-
Users in existing systems whose login names are based on the previously used Windows SAM name can no longer be used.
-
- Kerberos authentication at enaio® server is activated.
- Login to enaio® by entering the UPN. Example: smith@company.com.
- Users from different domains of a company can be combined in the Entra ID and managed centrally there.
- Permitted Entra ID security groups as part of the synchronization.
The following steps are necessary in Entra ID in order to register the application.
Entra ID: Registering Applications
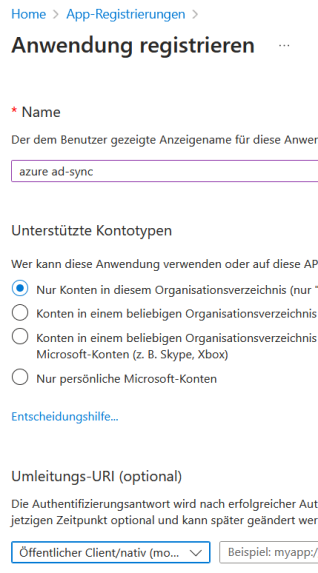
A new registration is created in the 'App registrations' area in the Microsoft Entra portal. A name is assigned for the registration. 'Only accounts in this organizational directory' is activated as the account type. A redirect URI is not required.
Creating Secret Client Keys
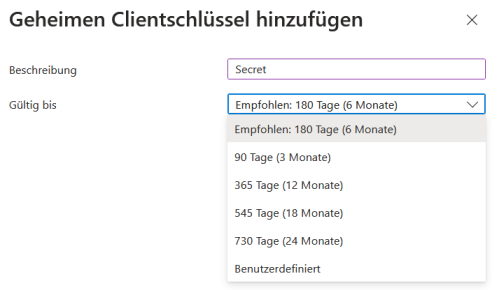
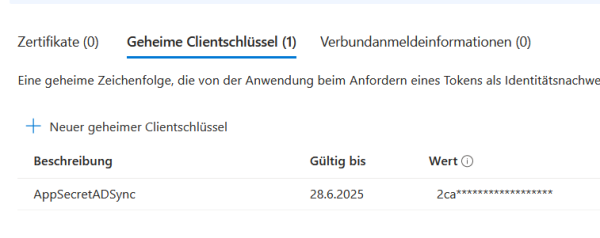
A secret client key is generated for the created registry in the 'Certificates and secrets' area. The new secret client key requires a name. The validity must also be specified. A maximum of 24 months is possible. It is no longer possible to connect enaio® to Entra ID once the time has expired.
The value that is generated for a new client key must be saved separately. It needs to be specified when configuring enaio® directory-sync.
Setting API Permissions
The created registration requires further API permissions. These can be set in the 'API permissions' area of the Microsoft Entra portal.
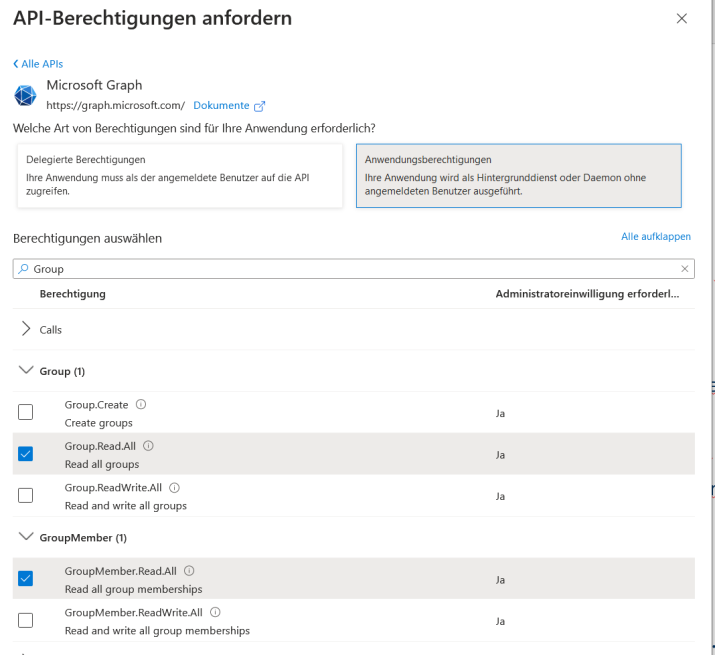
The following permissions are required. They are set in the 'Microsoft Graph' area as an application authorization and then with the consent of the administrator.
- User.Read.All
- Group.Read.All
- GroupMember.Read.All
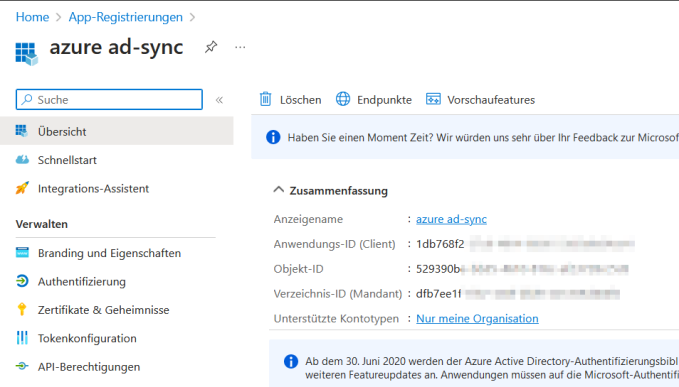
Copying Values from the Overview
The following values must be copied from the app registration overview and used for the connection configuration:
- Application ID (client)
- Directory ID (tenant)
 areas. Use the toolbar to show all hidden areas at once:
