Dunning and Retention Periods
Dunning periods are used to make sure that activities or sequences of activities are processed within a specific period of time. For a dunning period, you will have to specify which activity is executed if the time period is exceeded.
Retention periods are used to specify that activities or sequences of activities cannot be completed before the end of a certain time period.
Specify the start or end of an activity for dunning periods:
- The start of an activity is defined as the moment a user starts the corresponding process and the process step is personalized.
- The end of an activity is defined as the moment a user forwards a process step.
A retention period always covers the period between the start of one activity and the start of another activity.
Dunning periods can additionally be specified for multi-instance activities for the time period between the start and end of an instance. The start and end of an instance, however, are only available for the time period within an instance.
Dunning and retention periods are set up in the model editor on the Dunning and retention periods tab.
Dunning Periods
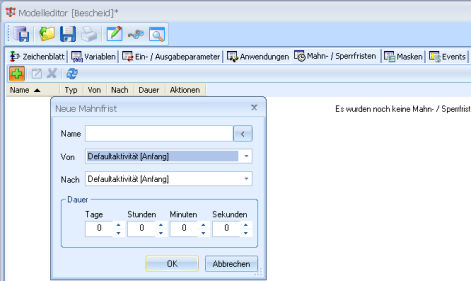
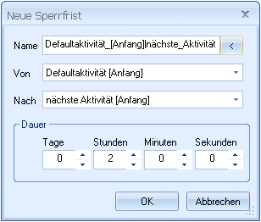
A dunning period is set up using the context menu on the Dunning and retention periods tab:
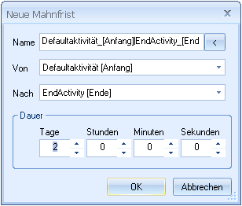
- In the From field, enter the activity the period starts with.
- In the To field, enter the activity the period ends with.
- Now click the button and the Name will be created from the From and To fields.
- In the Duration area, enter how long the period should last.
- Confirm by pressing OK.
The dunning period and associated data are displayed on the Dunning and retention periods tab. It can be edited or removed using the context menu.
For each dunning period you specify an action to be performed in case the deadline has expired.
- Choose Action from the context menu of a dunning period.
The Actions dialog will open.
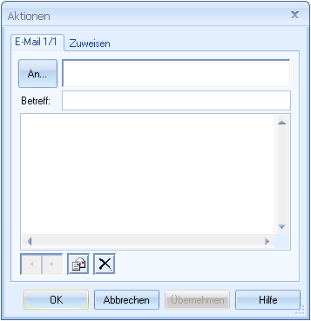
If you want an e-mail to be sent after the dunning period has expired, enter the recipient, subject, and text on the E-mail tab.
You can select recipients from the organizational structure with the To button.
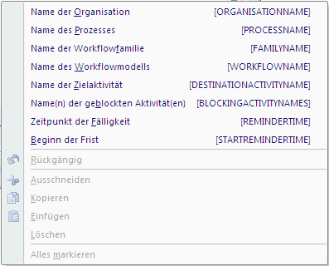
You can enter variables in the subject and text areas using the context menu.
Click the E-mail button to configure additional e-mails.
If you want to assign the activity after the end of a dunning period to other users, enter these users on the Assign tab.
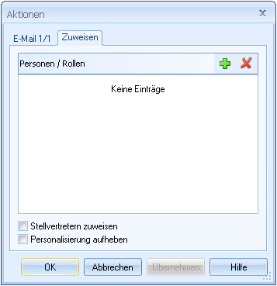
Use the Add icon to select persons or roles from the organization.
You can also assign this activity to substitutes.
After the deadline has expired, any participant in the activity and any user to whom the activity had been assigned can execute the process step. If the process step has already been personalized by a user, you will need to remove the personalization settings.
If you set the personalization to be automatically suspended after the deadline has expired, skip this step.
- Confirm the action data for the dunning period by pressing OK.
Click the Save button in the toolbar of the model editor to save the configuration data.
Retention Periods
A retention period is set up using the context menu on the Dunning and retention periods tab:
- In the From field, enter the activity the period starts with.
- In the To field, enter the activity the period ends with.
- Now click the corresponding button and the Name will be created from the From and To fields.
- In the Duration area, enter how long the period should last.
- Confirm by pressing OK.
The retention period and associated data are displayed on the Dunning and retention periods tab. It can be edited or removed using the context menu.
Click the Save button in the toolbar of the model editor to save the configuration data.
 areas. Use the toolbar to show all hidden areas at once:
