Catalog Add-on
The catalog add-on is only available for ANSI installations. The catalog add-on will be discontinued as of a following version. The functionality will be replaced Treeview add-on.
The catalog add-on can be configured as a list, tree, or hierarchy catalog. Unlike these catalogs, the catalog add-on has many other functions as well as a COM interface, meaning it can be easily activated via scripts.
As a tree catalog or a hierarchy catalog, the user can be authorized to make multiple selections.
You assign the catalog add-on to a text field. Use the file selection dialog to select the file axaddxmltree.dll located in the enaio® editor installation directory and the administration components.
Catalog data is saved in an XML file in the directory \etc of the data directory. The file is named 'axaddxmltree', followed by the hexadecimal field GUID. The GUID field can be found in the object definition file.
You can optionally specify a catalog file om the configuration field:
EXTRA00=bezeichnung.xml
The catalog file is created during configuration and saved in the directory \etc. Catalog files can be assigned several catalog add-on fields. Catalog files need to be copied to all other etc data directories in installations with several servers.
Configuration is performed in enaio® client and requires the 'Editor: Start' system role.
Please make sure that the data is not edited by more than one user at the same time.
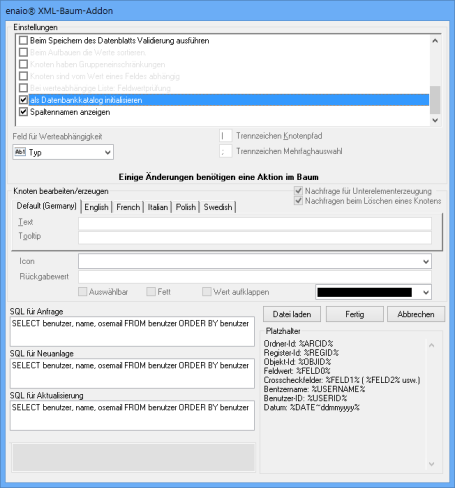
Open the configuration dialog by right-clicking the 'Add-on' button in enaio® client.

The dialog is divided into two areas: the settings area at the top which is used to set the catalog properties; and the area at the bottom which is used to create and edit catalog entries.
Settings
The following settings for a catalog are possible:
- Multiple selection
Users can select several values from the catalog and transfer them to the field. Enter a separator for a multiple selection; a semi-colon is set by default.
- Allow single-click to select
Users transfer a value from the catalog by clicking one time on an entry. The default setting is double-click.
- Status icon
Catalog values can be flagged with a dot that serves as the status icon in the catalog. Selected values are flagged with a green dot; those that not selected are shown with a red dot. A yellow dot is used to flag values with the property 'not selectable'.
If no status icon is displayed, all values are shown with a checkbox for multiple selection.
- Return value only from the node
Only the value of the current level is transferred to the field.
A catalog with this property is equal to a tree catalog. Without this property, the catalog is equivalent to a hierarchy catalog. Also enter a separator for the node path.
This setting has no effect on list catalogs.
- Remove selection for non-visible elements
When using multiple selection, some values in nested catalogs may not be visible as the nodes of the values can be collapsed.
If you select this option, values which are not visible are not transferred to the field.
- Allow selection of recent values only
Here you can specify if the user can only select the value of the last level, or if he or she can select and transfer values from any other level.
A catalog with this property and the property 'Return value only from the node' is equivalent to a tree catalog.
A catalog with this property and without the property 'Return value only from the node' is equivalent to a hierarchy catalog.
A catalog without this property and without the property 'Return value only from the node' is equivalent to a hierarchy catalog with the property 'Allow intermediate levels'.
In addition you can specify for every individual value whether or not it can be imported by the user.
- Initialize as list
If you have already created elements with nodes, you can create a linear list using this option. When enabling the option, you can choose whether sub-elements are deleted or whether the sub-elements are appended to the linear list.
You can disable the option again after linearization. If you do not disable the option, the list is only displayed in enaio® client. You will not be able to transfer elements.
- Show as selection dialog
List catalogs with multiple selection can be displayed as a selection dialog. Users can then transfer individual values in a selection range from the list of all values. This means that long lists can be arranged more clearly.
- Verify entries and show message box
If a user enters a value independently of the catalog that is not contained in the catalog, a note is displayed when the Add-on button is clicked.
- Validate when saving data sheet
If a user enters a value independently of the catalog that is not contained in the catalog, a note is displayed when the Add-on button is clicked.
The index data sheet stays open when saving, and the value is not saved.
- Sort values while loading
Entries in a node are automatically sorted alphabetically in the display in enaio® client.
- Nodes have group limitations
The display of the values depends on which group the user is assigned to.
- Nodes depend on the value of a field
The display of values depends on the value of another field. If the field is left empty, all values will be shown.
- For value-dependent list: field value validation
If the display of the values is dependent on the value of another field, a message is shown if a field is empty.
- Initialize as database catalog
The values are determined via an SQL query.
- Show column name
If the values are determined via an SQL query, the column names can be shown.
The properties 'Ask for confirmation when deleting a node' and 'Ask for confirmation when creating a sub-element' are only relevant for editing catalog data. You will be shown a message to this effect.
Catalog Entries
Depending on the selected settings, you can create a list catalog with values on one level or a tree or hierarchy catalog with nested values.
One tab is displayed for each language of the object definition in which you can enter a caption and a tooltip text for each value. The return value is the same for values, regardless of the object definition language.
Each value can be given the 'Bold' property. It will be highlighted in the catalog with a bold font. Each value can be assigned a color.
The 'selectable' property allows the user to select and transfer a value into the field. Non-selectable values are flagged with a yellow dot as the status icon or with a checkbox containing a red 'x'. If the user can transfer the values of several nested levels, non-selectable values are transferred as well.
The 'Expand value' option specifies that nodes should be shown expanded. This property applies to the current node that is being edited.
Use the following buttons to create and edit catalog elements:
|
|
New element |
Click the button to create a new element. Enter its caption and, optionally, a text for a tooltip. If you do not enter any return values, the caption is used as the return value. If you only make entries on the tab for the default language of the object definition, it will be displayed for all other object definition languages for which no alternate entries have been made. If elements have already been created, you can specify if you want to create a new element on the same level as the selected element (sub-element/No'), or if you want to create the new element below the selected element (sub-element/Yes').
|
|
|
Edit element |
You can change the caption, the tooltip text, the return value, and the properties. |
|
|
Delete element |
The element is deleted. Elements with sublevels can only be deleted together with the sublevels. You can turn the security notification on and off in the settings area. The change is instantly cached. |
|
|
Apply editing |
If you have created a new element or edited an element, you will need to confirm the changes with this button. The data is cached. |
|
|
Cancel editing |
If you have created a new element or edited an element, you apply the changes or cancel editing. |


Click Done to save the file with the catalog data and settings.
Click the Cancel button if you do not want the changes to be saved.
Additional columns with values can be created for values. These column values can be transferred to crosscheck fields or used as comments.
Group Limitations
The display of the values can be made such that it depends on which group the user is assigned to.
If you have activated the 'Nodes have group limitations' setting, then the Group selection button will be shown when creating and editing a value. This allows you to open the Selection dialog.
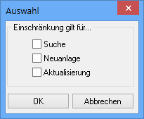
This is where you specify whether the display of the search, create, or update value should be limited to members of groups.
If you confirm the selection with OK, the Group selection dialog is opened.

This is where you assign the groups whose members should be shown the values from the list of all the groups.
Field Value Dependency
Whether or not the values are shown can be made dependent on the values of other index data fields.
If you have activated the setting 'Nodes depend on the value of a field', select an index data field from the 'Field for value dependency' list when creating or editing a value and enter the value in the input field on which the display of the catalog values should depend.
The 'Field for value dependency' list contains the index data fields of the folder type in addition to the index data fields of the object type for document types and register types.
If the field for the value dependency is empty, then the value is also shown. If you activate the property 'For value-dependent list: Field value validation', no value is shown if the field for the value dependency is empty.
SQL Queries
For catalogs with the property 'Initialize as database catalog', the values are created via SQL queries.
You can enter different SQL queries for query, create, and update processes.
If you query several columns, the data from the first column is transferred to the add-on field catalog. The data from the other columns can be transferred to fields with crosscheck properties.
Example:
The following SQL query produces a list of users with names, full names, and e-mail addresses.
SELECT benutzer, name, osemail FROM benutzer ORDER BY benutzer

The column name view can be switched on using the corresponding property. Multiple selection is not possible.
Values with Columns
Additional columns with values can be created for values. These column values can be transferred to crosscheck fields or used as comments.
How to create column values:
- Select a value.
- Click the New element button while holding down the Ctrl key.
- Enter the column value in the dialog.
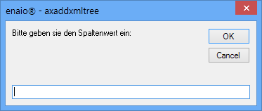
- Confirm by pressing OK.
The column values are assigned the value.

The column values can be edited and deleted using the corresponding buttons.
When you open the add-on catalog, the values are shown as follows:
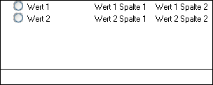
The value can be transferred by the user to the add-on field catalog which exports column values to crosscheck fields.
Column values apply for all languages.
Catalog Add-On and Crosscheck Fields
Values from columns and values from multi-column SQL hit lists can be transferred to other fields in the data sheet. To do this, the fields must have the property Controlled by cross check.
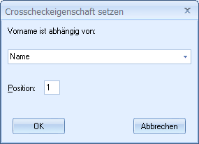
When configuring the crosscheck property, specify the add-on field catalog and the position.
For column values, the first column values are transferred via position 1; for SQL hit lists, the second column values are transferred via position 1.
COM Interface
The following example script defines a catalog with two entries which are displayed for the user. The entry 'A' is preset.
Set ObjList = CreateObject("axaddxmltree.AsAddon"')

If ObjList Is Nothing Then
MsgBox "Die Basisbibliothek ""axaddxmltree.dll"" konnte nicht initialisiert werden." + vbCrLf + "Überprüfen Sie Ihre Installation.", vbInformation + vbOKOnly + vbSystemModal, "XFR"
Else
Dim xmlstring as String
xmlstring = ""
xmlstring = "<axaddxmltree returnsinglevalue='1' multiselect='1' withcheck='1' initaslist='1' initasdialog='0' selectlastnode='0' deselectwhencollapse='0' group_splitchar=';' gridlines='0'>"
xmlstring = xmlstring & "<ebene spezialicon='PERSON' selectable='1' returnvalue='A' bold='0' forecolor='0' name='A' tooltip='A'/>"
xmlstring = xmlstring & "<ebene spezialicon='PERSON' selectable='1' returnvalue='B' bold='1' forecolor='0' name='B' tooltip='B'/>"
xmlstring = xmlstring & "</axaddxmltree>"
sValue = "A"
ObjList.InitFromString sValue, xmlstring
Set ObjList = Nothing
End If areas. Use the toolbar to show all hidden areas at once:
