enaio® protocol-viewer
Logs in the internal log format (*.evn) can be opened with enaio® protocol-viewer. You can find the axrptview.exe application in every directory that contains components.
To open logs, use the File menu or click the Open file button in the toolbar. Logs currently in use can be updated in the View menu, by pressing F5, or by clicking the Update button in the toolbar.
enaio® protocol-viewer saves the settings (the most recently opened log file, settings for the navigation and events area, and filter/search criteria) in a configuration file and loads it at startup.
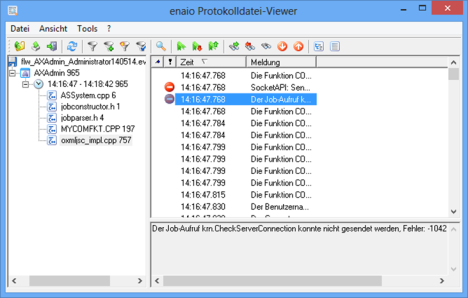
The user interface is divided into two areas: the navigation area on the left and the events area on the right.
Navigation Area
In the navigation area on the left, you will see a navigation structure which you can set up by pressing the Tree sorting button.
|
|
The Tree sorting button in the menu bar is used to open the Tree sorting dialog. |
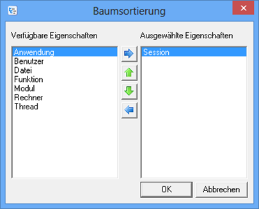
This dialog permits you to select the required level for the navigation structure and to specify the intended property sequence.
In addition to the entries in the navigation area, the number of assigned events is specified. This information can be hidden by selecting the matching entry in the View menu.
If you select an entry in the navigation area, you can export the assigned data. To do so, go to the File menu to open the Export dialog and select the format and the file. If you choose the 'XML' format, only job calls are exported in XML form.
Events Area
In the events area on the right, you can find a list of the individual events for the lowest level selected in the navigation area. Below the list, you will see a notification corresponding to the selected event.
|
|
Click the List sorting button in the menu bar to enter the columns and specify the order in which they appear. |
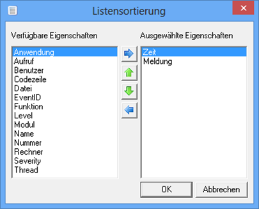
The list in the events area is sorted according to the selected columns and their defined order. If the entries in the previous column are the same, the entries of the other columns in the events area can be sorted in ascending or descending order.
The Bookmark and Event type columns are automatically set at the beginning, but they cannot be used for sorting.
The event types are called as follows:
|
|
Error |
|
|
Warning |
|
|
Information |
The toolbar provides filters which you can use to restrict the view to specific event types:
|
|
Show errors, warnings, and information |
|
|
Show only errors |
|
|
Show all types |
You can restrict the list in the events area to specific event types, time periods, and levels. In addition, you can search for event types.
Filter
|
|
Use the Define filter button in the menu bar to configure filters. |
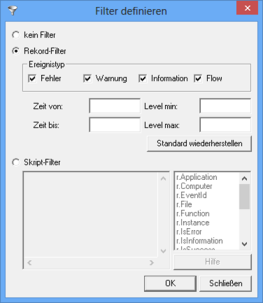
Select one or more event types and specify an optional time period (from/until) and a range of level (minimum/maximum).
If you click OK, only the events that meet the criteria will be shown. In the navigation area, levels that contain no relevant data will be hidden. The number of events will be refreshed.
The filter criteria will be saved automatically.
You can also set up script filters. Click the Help button to view further information.
Search
|
|
Use the Find button in the menu bar to specify search criteria. |
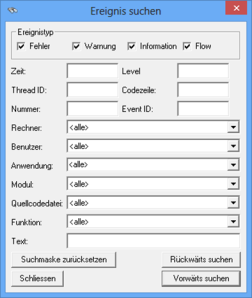
Select one or more event types and optionally enter additional properties as search criteria.
You can run the search by pressing the Search backward / Search forward buttons in the dialog or toolbar. All search criteria will be saved once the dialog is closed.
Bookmarks
You can assign  bookmarks to events in the events area. In total, there are ten bookmarks available.
|
|
Press the Show/hide bookmarks button to add a bookmark to a selected entry or to delete the bookmark again. |
You can go to the next or previous bookmark using the buttons on the toolbar; you can open any bookmark by selecting the bookmark number in the Tools > Go to bookmarks menu.
Details
The details of each event, i.e., all of its properties, can be shown.
|
|
Click the Details button to open the properties window of the selected event. |
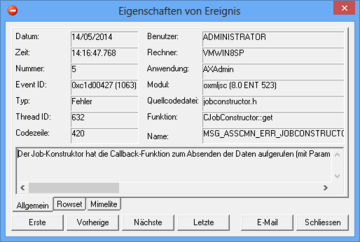
Use the buttons to switch between the detailed properties of the next or previous event or the first and last event.
You can use the E-mail button to transfer the displayed data to an e-mail form in your default e-mail application.


 areas. Use the toolbar to show all hidden areas at once:
