The Navigation is your personal workspace. The navigation provides you with quick access to full-text and portfolio queries as well as to queries with variables.
You can also place links to object references, saved searches, search forms, and links to external applications on the navigation area, as well as group them. Double-click an entry on the navigation area to start searches, object references, and external applications.
Groups in the Navigation
If you want to manage object references, saved searches, search forms, or links to external applications via the navigation area, you will have to first create a group.
-
Open the
 Navigation.
 -
Right-click the toolbar to open the context menu in the navigation area.
Alternatively, you can display the Navigation ribbon tab by selecting a group entry in the navigation.
-
Select Add >
 Group.
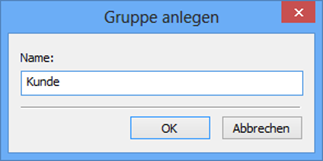
The Create group window will now open.
-
Enter a name for the group.
-
Click OK or press the ↩ enter key.
The group is created and will open.
The content area of a group can be shown and hidden using an arrow. Drag the required objects onto this area to create object references.
Groups in the navigation can be deleted and renamed in the Group ribbon tab or the context menu. The order of the groups in the navigation area can be changed using the mouse. Simply click the group while pressing the mouse button down and move it to another position.
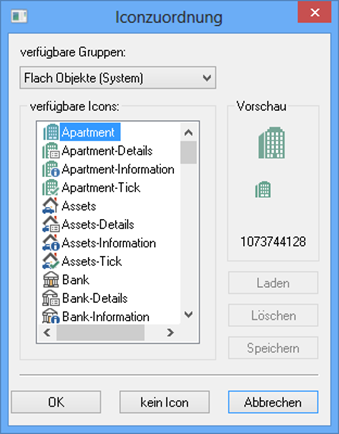
You can assign an icon to every group. Click the Select icon item in the context menu or Group ribbon tab to open the Icon assignment dialog. The dialog offers all pre-installed icons from a group and allows you to upload additional icons.
You will need the appropriate system role to load and delete icons. Access rights and system roles are assigned by your administrator.
If you want to load icons, select the General icons (user-defined) group, click the Load button, and choose an icon file (*.ico) from the file selection dialog.
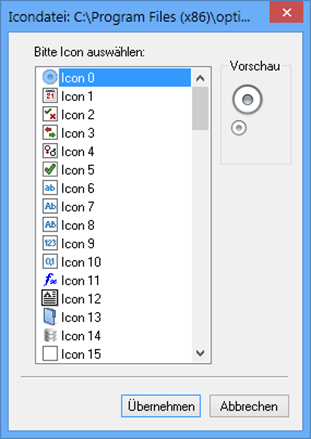
If you select a library (.dll) or a program (.exe), all icons contained in the file will be displayed.
You can select the required icons and apply them.
The imported icons will be placed in the General icons (user-defined) group. The assignment must be saved before you can use the icons.
Groups, like queries, can be removed from the navigation area using the context menu.
Object References
All objects that are shown in the object search and all objects in a hit list or folder window can be dragged onto the content area of a group in the navigation in order to create an object reference. You can also drag objects from hit lists or folder windows into the content area of a group in the object search and create object references there.
-
Open the
 Navigation or the
  Object search.
 -
In the navigation or in the object search, open the content area of a group via the associated
 Arrow.
 -
Select an object in the hit list or a folder window.
You can also select an object in the object search if you want to create an object reference in the navigation.
-
Drag an object to the content area of the group in the object search or navigation while holding the mouse button pressed down.
An object reference will be created.
Using the context menu, you can edit objects on the navigation. The functions will vary depending on the object type.
Queries in the Navigation
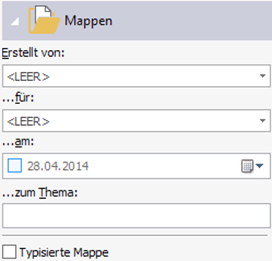
The navigation area provides quick access to queries with variables, full-text queries, and portfolio queries. The forms for these queries are not opened in a new window on the desktop; rather, they can be shown and hidden in the navigation area.
Go to Add > ![]() Portfolio queries in the navigation's context menu to integrate a portfolio search form into the navigation. Alternatively, you can display the Navigation ribbon tab by selecting a group entry in the navigation and then clicking the
Portfolio queries in the navigation's context menu to integrate a portfolio search form into the navigation. Alternatively, you can display the Navigation ribbon tab by selecting a group entry in the navigation and then clicking the ![]() Portfolio queries function.
Portfolio queries function.
The form can be shown and hidden using the associated ![]() Arrow.
Arrow.
Using the context menu, you can edit objects on the navigation. The functions will vary depending on the object type.
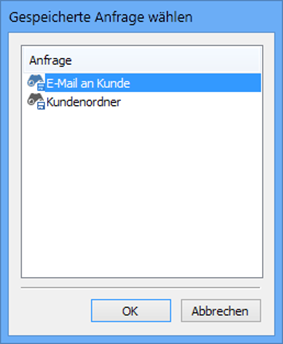
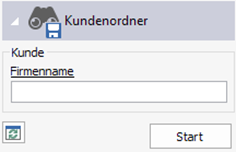
Select Add > ![]() Query with variables in the context menu of the navigation to add an existing saved search with variables to the navigation (see Saved Searches).
Query with variables in the context menu of the navigation to add an existing saved search with variables to the navigation (see Saved Searches).
Alternatively, you can display the Navigation ribbon tab by selecting a group entry in the navigation and then clicking the ![]() Query with variables function.
Query with variables function.
Select the required query and confirm by clicking OK.
The query is shown on the navigation.
The form can be shown and hidden using the associated ![]() Arrow.
Arrow.
Using the context menu, you can edit objects on the navigation. The functions will vary depending on the object type.
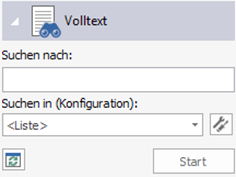
Select Add > ![]() Full-text query in the navigation's context menu to integrate a full-text search form into the navigation.
Full-text query in the navigation's context menu to integrate a full-text search form into the navigation.
Alternatively, you can display the Navigation ribbon tab by selecting a group entry in the navigation and then clicking the ![]() Full-text query function.
Full-text query function.
The form can be shown and hidden using the associated ![]() Arrow. The search form offers you options to configure and save specific full-text searches.
Arrow. The search form offers you options to configure and save specific full-text searches.
The <all> configuration is always available and applies to full-text searches of all objects. The <list> configuration is also always available and restricts the full-text query to the currently focused list, such as the content of a folder or register, a hit list or a portfolio.
You can create further configurations via the ![]() Full-text configuration icon (see Configuring the Full-Text Search Input Field).
Full-text configuration icon (see Configuring the Full-Text Search Input Field).
Links in the Navigation
Links to external applications that you created in ![]() Object search can also be shown in the navigation.
Object search can also be shown in the navigation.
-
Open the
 Object search.
 -
In the Desktop area, select the appropriate link to an external application.
-
Right-click to open the context menu.
-
Click the Copy for navigation entry in the context menu.
-
Switch to
 Navigation, select a group, and then open the context menu by right-clicking with the mouse.
If necessary, you must first create a group in the navigation (see Creating groups).
-
Click the Copy from object search entry in the context menu.
The link is shown in the navigation.
 areas. Use the toolbar to show all hidden areas at once:
