Assigning Users to Groups
Users can be members of a number of groups. The user is always given the most far-reaching access rights from all assigned groups.
Follow these steps to assign users to groups:
- Open the Security system window.
- Click on the Group administration tab.

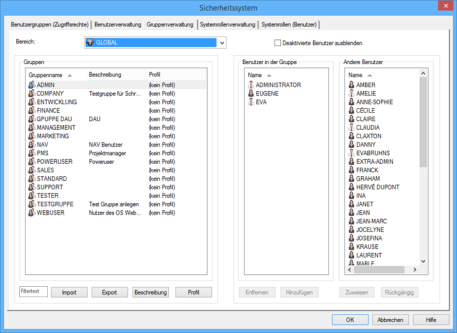
- All groups are listed in the Groups area. If you select a group, all users in the group are shown in the Users in the group area.
- You can choose not to display deactivated users. You can restrict the list using a filter text.
- Select a user from the group and double-click or press the Remove button to remove it from the group. The user will be listed in the Other users area.
- Select a user from the Other users area and double-click or press the Add button to enter it into the currently selected group. The user will be listed in the Users in the group area.
- Click the Assign button to save the changes.
- Click the Undo button to discard all changes.
The group's access rights to archive objects are configured on the User groups tab.
 areas. Use the toolbar to show all hidden areas at once:
