Triggers for Data Transfers
You can set up various 'triggers' for data transfer. They are as follows:
-
Linking an ArchiveLink® document (interpreted as an enaio® data2ecm event)
-
Writing a change document (can be interpreted per report – job-driven)
-
An individually queried event (can be interpreted per report – job-driven)
The trigger places a special object in the processing queue.
Only the ArchiveLink® link is recognized and evaluated synchronously. All other triggers are not actual events. They have to be subsequently recognized and evaluated by reports.
ArchiveLink® for Document Data
If you want to transfer data to ArchiveLink® documents, the specific enaio® data2ecm project must be linked to the configured ArchiveLink® document type and object type (see Global Project Assignment). Then, each time a document of this document type is filed, the associated document data is imported into the enaio® system according to the customized settings.
Master Data Reports
If master data like customers and vendors are to be transferred, special reports must be opened in SAP.
Two reports are available for the initial transfer of master data:
-
/OSGMBH/DX_EXPORT_KRED_STAMM: Output vendor master data
-
/OSGMBH/DX_EXPORT_DEBI_STAMM: Output customer master data
These can be accessed via the following transactions:
-
Output vendor master data: /OSGMBH/D2E_KRED
-
Output customer master data: /OSGMBH/D2E_DEBI
The following selection criteria can be used when starting reports:
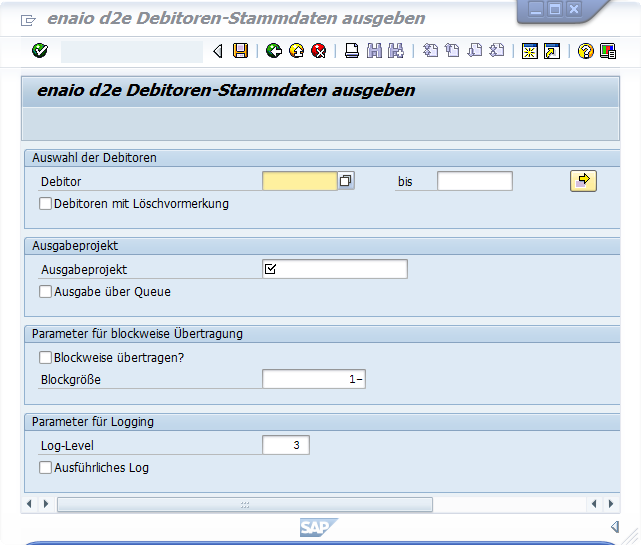
-
Select vendors/customers:
Restrict to certain number ranges and option to include business partners with the deletion flag -
Output project:
Project from enaio® data2ecm Customizing (input help available here) -
Parameters for block-by-block transfer:
Restrict, for example, to 200 objects (prevents SAP memory overflow) -
Parameters for logging:
Log level can be raised up to max. 5
Two reports are available for the transfer of modified master data:
-
/OSGMBH/DX_EXPORT_KRED_CHANGE: Output changes to vendor data
-
/OSGMBH/DX_EXPORT_DEBI_CHANGE: Output changes to customer data
These can be accessed via the following transactions:
-
Output changes to vendor data: /OSGMBH/D2E_KRED CHG
-
Output changes to customer data: /OSGMBH/D2E_DEBICHG
These reports check the change documents automatically written in SAP for the relevant business object and, in addition to the modified objects, also record the newly created master data in the specified time period.They automatically pass on all recorded objects to enaio® data2ecm for transfer.
The following selection criteria can be used when starting reports:
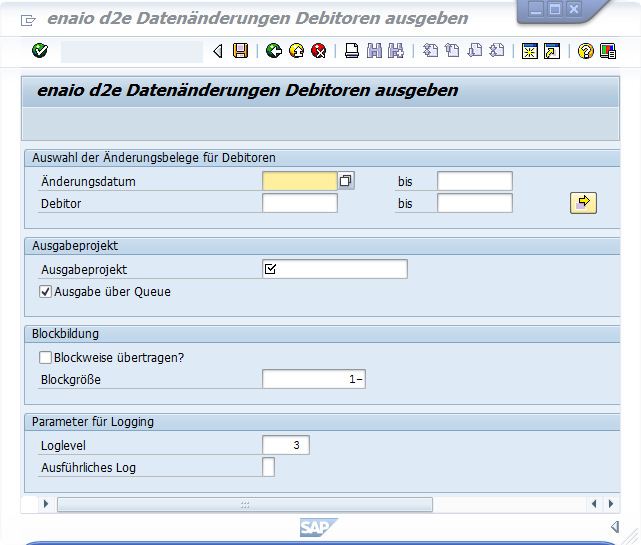
-
Select change documents for customers/vendors:
Restrict to a change period and/or defined number ranges -
Output project:
Project from enaio® data2ecm Customizing (input help available here) -
Parameters for logging:
Log level can be raised up to max. 5
To ensure the regular transfer of modified data, the 'CHANGE' reports must be scheduled as a job in SAP. In this case, you need to select the change date, for example, 'Today minus two days' through to 'Today'.
Individual Transfer of Master Data Via the Generic Object Service
Master data (e.g., vendors, customers, employees) can also be transferred manually by using the generic object service of the relevant SAP object.
Setup
To begin, you will need to create an output project using enaio® data2ecm Customizing (see Customizing).
Integration as an object service then takes place in the transaction /OSGMBH/J2E_CUST.
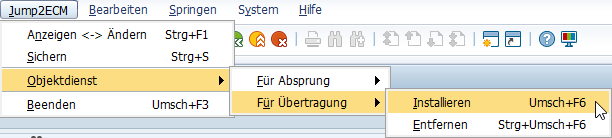
The data transfer object service must be installed one time for each SAP system. To do this, the Objektdienst > Für Übertragung > Installieren (Object service > For transfer > Install) menu item must be enabled in enaio® jump2ecm Customizing if the traffic light is red. The object service is installed on all clients.
As a result, an entry is made in the SAP table of attributes of generic services (SGOSATTR).
These attributes define, among other things, where the enaio® data2ecm entry appears in the menu of the generic object services. OS recommends adding it after the attachment list (VIEW_ATTA).
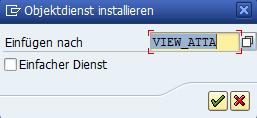

If there is no more than one target point (one record) in enaio®, tick Simple service if you do not want to expand the list at this point.
The Jump2ECM > Objektdienst > Für Übertragung > Entfernen (Jump2ECM > Object service > For transfer > Remove) menu item can also be used to remove the object service again in order, for example, to reinstall it at a different location.
New transfers can be created for each customer via the context menu.
These are entered in the tree under the customer. The customized settings that need to be entered are made on the right in the workspace.
At this time, you define the locations in SAP (from which object type) from which data is transferred to the enaio®.
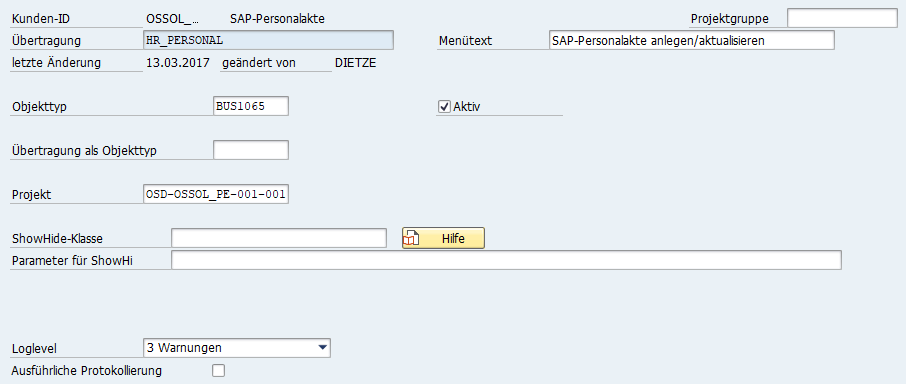
The following values must be entered:
|
Field |
Description |
|---|---|
|
Transfer |
User-defined name |
|
Menu text |
User-defined name (shown to users) |
|
Object type |
SAP object type |
|
Active |
Flag indicating whether jump configuration is enabled |
You can also enter values in other optional fields. These include:
|
Field |
Description |
|---|---|
|
Project group |
Used to group jumps and transfers |
|
Transfer as object type |
SAP object type if data is to be transferred from a location other than the trigger point |
|
Show/hide class |
Used to implement a class that influences whether a transfer is visible in the generic object services. Example: /OSGMBH/CL_JUMP2ECM_FILTER |
|
Log level |
Log Configuration |
The following buttons which may come in handy are available above the customer jumps/transfers tree:
|
Field |
Description |
|---|---|
|
Copy |
Copy transfers |
|
Deleting a Link |
Delete transfers |
|
Test |
Functional test of a transfer configuration: The selection values specific to the transfer must be entered in order to perform the test. |
|
Transport |
Individual or all transfers (and jumps) of a customer can be assigned to a transport order. |
|
Switch |
It is possible to switch to a view sorted by business object from the view of transfers sorted by customer. |
Function
Data transfer is launched in the relevant application via the generic object services.
It is carried out immediately after the data transfer is called. Once the transfer is completed, the results are shown in the log.
 areas. Use the toolbar to show all hidden areas at once:
